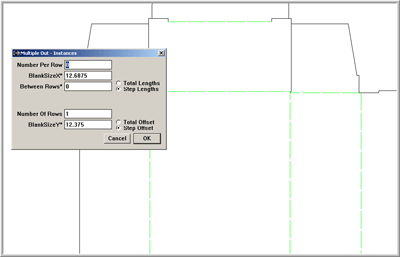
If a die design needs to be created in a multiple out configuration from a single or “one-off” design, you can use Rotary Dies → Multiple Out to generate instances of the one-off piece. An instance is a copy of the original design that will automatically update itself when changes are made to the original item. The main use for this function is to eliminate repetitive notching in rotary dies. Notching flat dies is an automatic process that makes instances unnecessary. Multiple out die designs are easy to create using this command. Start by getting the geometry you want to make instances of free of gaps or any other deficiencies as normally would be done. This straight tuck box was picked from the Tuck Tops style sheet and the sizes used were: 4x3x7 with a tuck at .5” and the glue flap at .5”. Use the Rotary Die Sheet... function under the Rotary Dies menu to create a new Rotary Die Sheet. When you do, you should see the following dialog box appear:

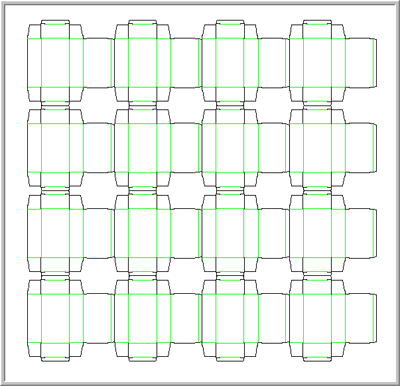
If not, choose Rotary Dies → Multiple Out. The blank Size X and Y for the original object, or the “control” object, is placed in the appropriate boxes for you automatically. Simply type the number of instances you want per row, press the Tab key on your keyboard to advance to the Number of Rows box and enter the number of rows needed, then click “OK”. The instances are generated for you and entered into the design. The design below was generated by entering 4 in both the number per row and number per column.

The control object for the array of instances is always the object in the lower left corner of the design. To see how instancing works, change the color of any line in the control object and then choose Rotary Dies-Update Instances to see the color update in all the instance objects. Add a circle or some other feature like a hand hole to the control object. Update Instances again to see the additional geometry added to all the instances. Instances save enormous amounts of time when notching multiple out rotary dies. Notice that if you click on an instance object, it is a group. The Edit Objects dialog shows that it is a symbol object. Each instance is a symbol of the control object until it is exploded, at which time it becomes geometry just like any other geometry in the design. Once you explode an instance object, the instance can’t be brought back unless you use Undo back to a point where the instance still existed. Once an instance is exploded, it no longer updates along with the control object. When a multiple out rotary design contains instances that span across a core seam, those instances must be exploded prior to notching. Instances can’t be notched independently from the control object. In order to get proper notching to flow away from the seam lines, instances that cross the seam must be exploded before notching.